Elvis is open source and shared under a GNU GPL v3.0 licence so you can download everything required to build and use it from its GitHub page. It is very much a work-in-progress, and a lot can be improved. Included in there is a basic template for an end-effector, you can build on top of that to suit whatever it is you want to do with it. You can also modify the basic design of the robot itself to suit your requirement.
Elvis Mission Control in Grasshopper
Why Elvis?
Elvis was conceived to fit this need. It's small, light and portable, and is meant for quick prototyping & iteration -- hence the direct control from within Grasshopper. It is not meant to replace an industrial-grade arm: it is not as precise or as fast, it costs roughly 5% of the cheapest desktop industrial arm available, and it takes a person about 2-3 days to put one together.
Elvis's version of "Hello world"
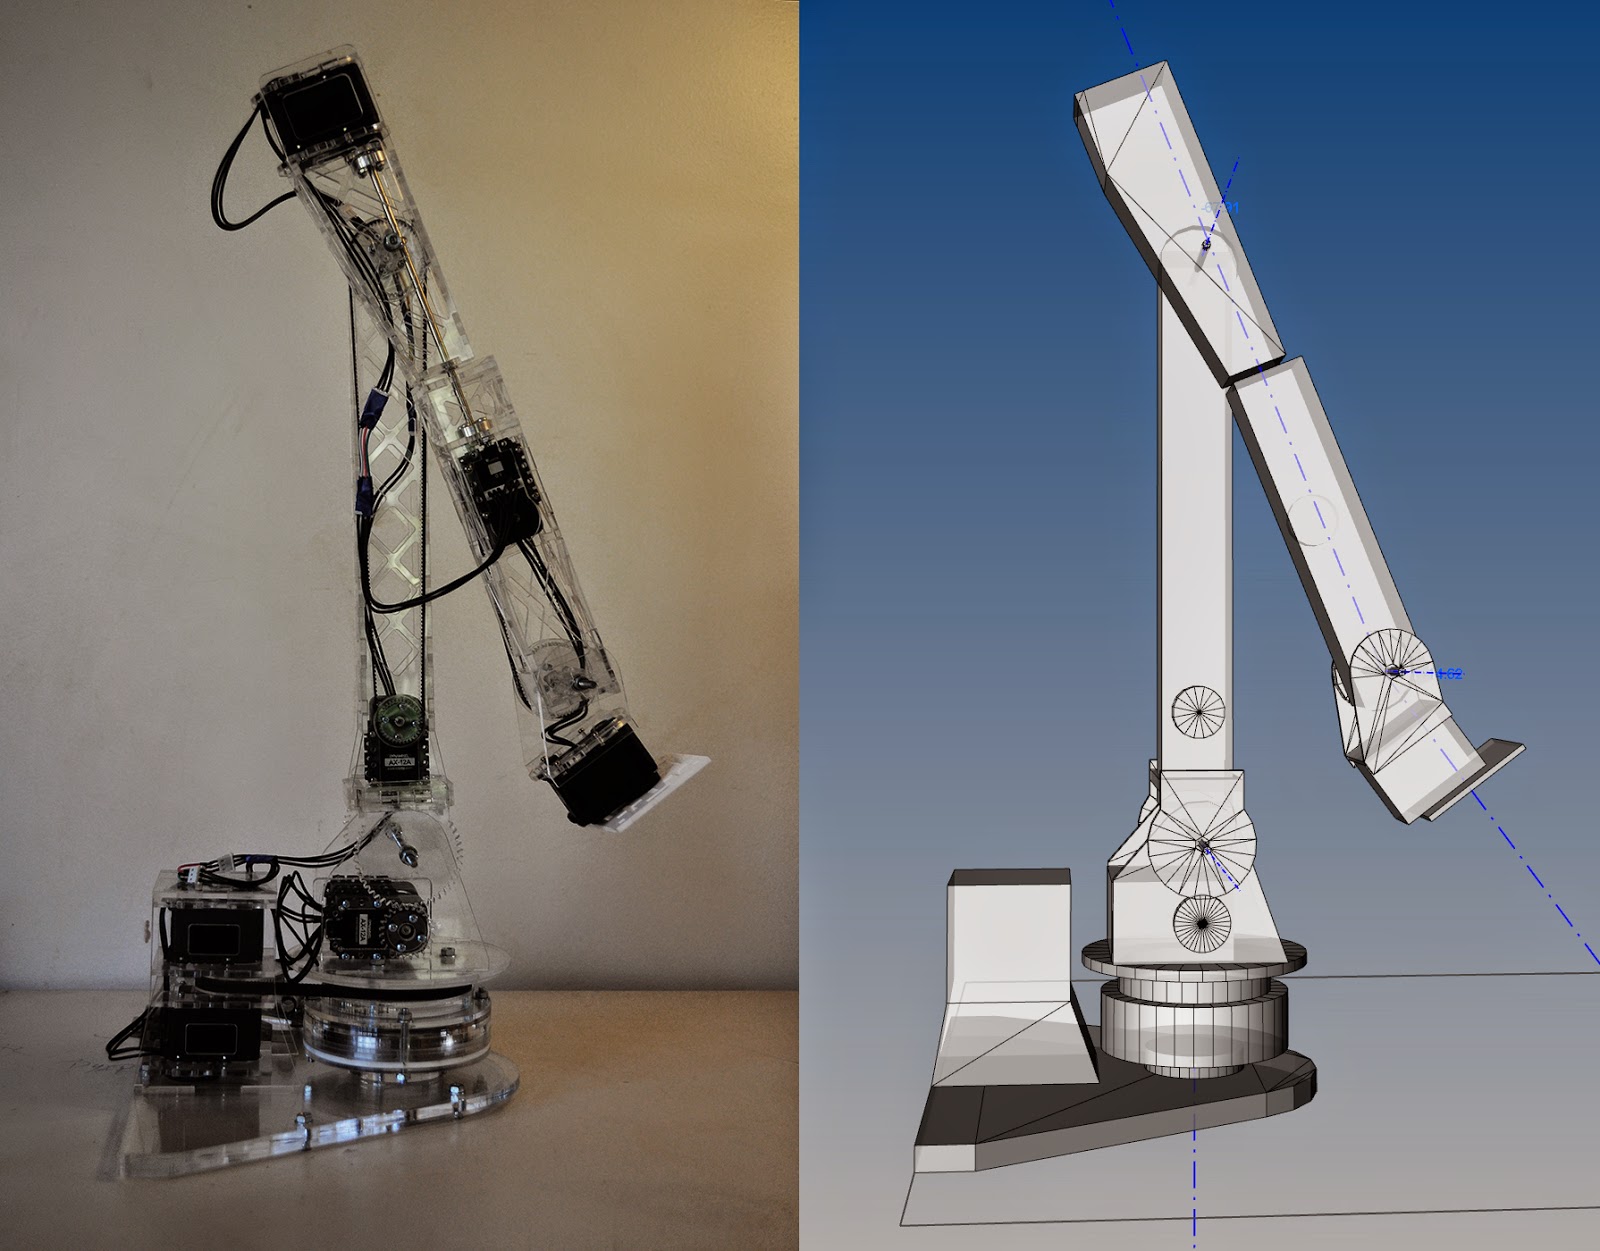
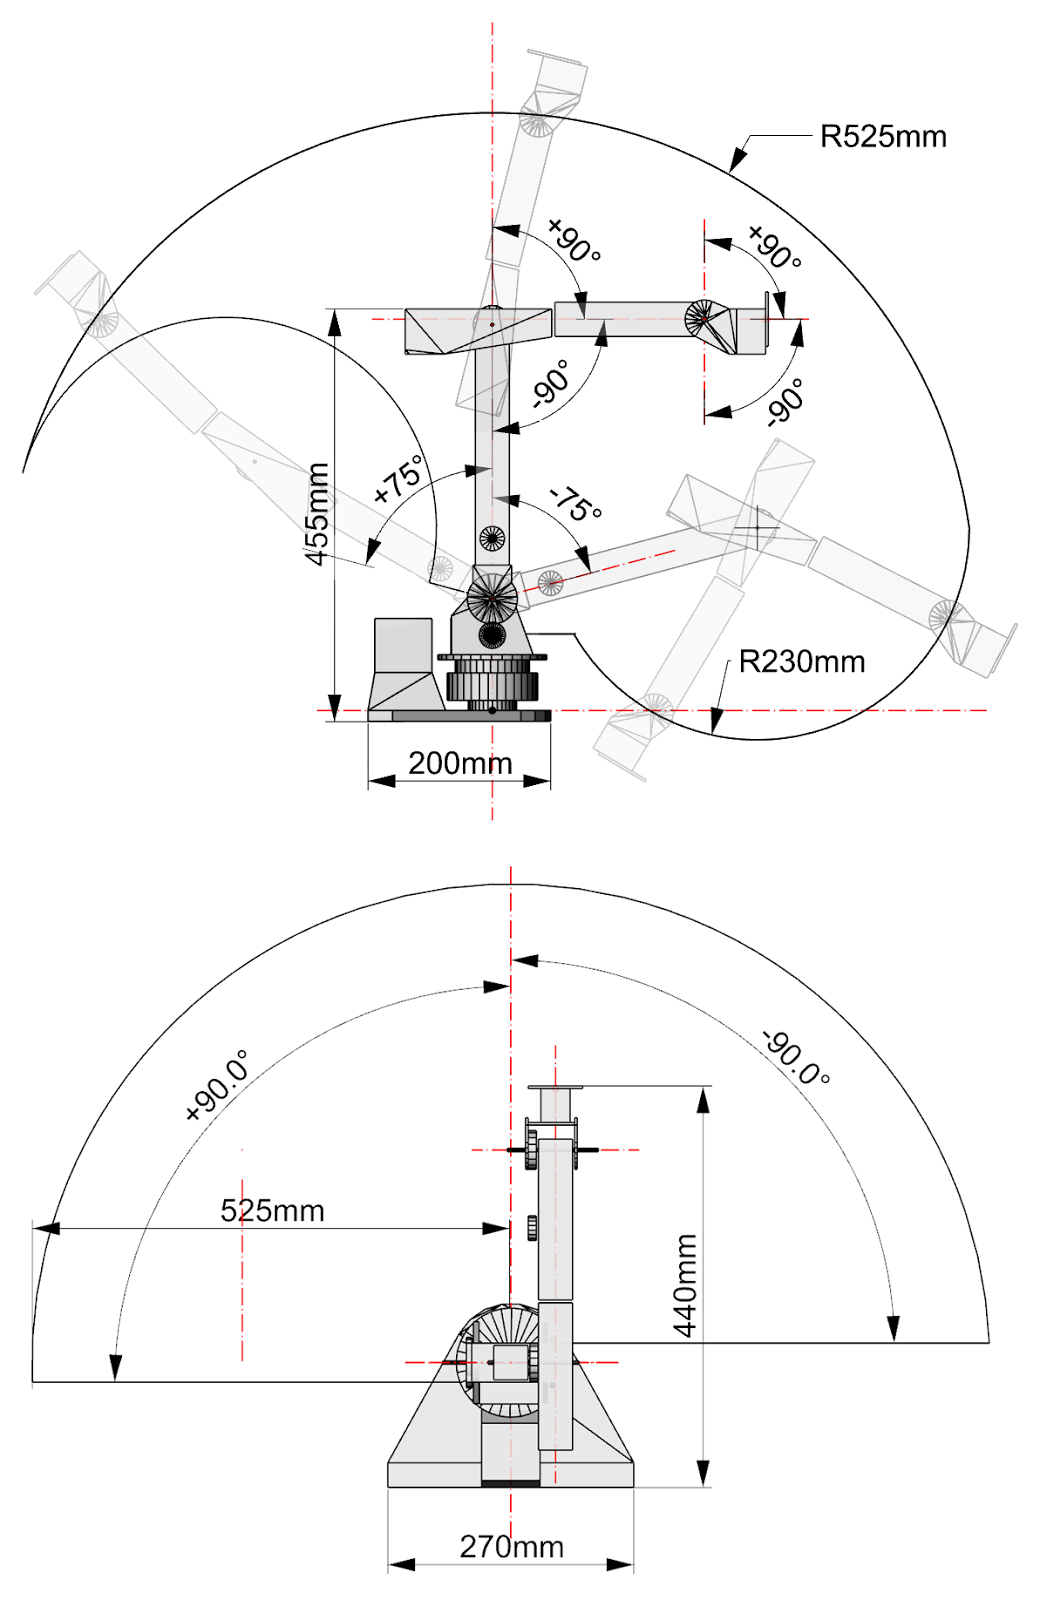
Technical Details
DOF/Axis: 6
Motors: 8 x Servos, Dynamixel AX-12A
Range: ~525mm for wrist Centre (diagram below explains in detail)
Cost: £480 (UK). Presumably cheaper in the US/Asia. Detailed breakdown here.
IK Solver: Trigonometric
Wrist Type: Spherical
Future Development
Elvis uses servos that are capable of reading their positions, so within a tolerance, the arm already "knows" where it is. This could easily be used as a forward kinematic system to digitally read positions in space and generate gcode for larger arms, similar to the system proposed by Andrew Payne, with the added benefit of a 6th axis. A camera/leap/kinect/other sensory mechanism can be used to setup an enhanced feedback system giving it a more precise idea of where it is, where it should be or what it should do next.
There are some very good robot simulation tools available on Grasshopper such as Daniel Piker's Lobster, Robots.IO's Godzilla, etc. Last I checked I was unable to use Lobster as the IK solver for Elvis because of Elvis's asymmetrical axis configuration. I haven't been able to test it with Godzilla as yet, but the intention is to make Elvis easier to use with all these fantastic tools already available.
Acknowledgements
Man vs. Robot: Haider and Elvis in an 'axis-fight' at the AA Visiting School Dubai
 |
| The Grasshopper control file can compute IK for given toolpaths and directly move Elvis on those paths. |